I have already written an article about gaming on a VIFO setup in 2016, but a quick recap on what VFIO is: It's a way to pass direct access of hardware components to virtualized environments. This lets you eg. pass a GPU into a virtualized windows, and achieve bare metal performance. My main OS is linux, but I do a lot of gaming, and this is the best setup for me, from both an ergonomics, and a performance perspective. I have been using this since 2016, and I have an extremely good experience with it, so it was natural to set it up again on the new PC.
A lot of things have changed since 2016, so I was expecting a lot of trouble, but it was actually quite painless. I had the whole setup done in about 2x3 hours.
Things that have changed
In the past, I have used a simple shell script, that was calling qemu directly. This was done because virt-manager wasn't really a thing when VIFO got picked up in popularity, and I got too invested in that shell script to figure out how to do things with virt-manager.
So now that I started over, I'm using virt-manager. It was much easier to figure out how to do things in the GUI, than it was to dig the information out from qemu's man page. Unfortunately, I'm still at a loss on how to do a few things. These are now solved, see edit below.
Previously, I had my shell script issue cpupower frequency-set -g performance, before starting qemu. This was needed because the VM threads will not hit the CPU frequency limits needed for the CPU to ramp up. Now I have to do this manually, at least for now.
I have to remember to killall xautolock as well, otherwise xautolock sends the PC to suspend, since the keyboard/mouse that I send to the VM are entirely isolated from linux, so xautolock thinks the computer is idle.
Edit 2020.11.24
This is solved now, virt-manager invokes /etc/libvirt/hooks/qemu when starting qemu, if it exists. So I created this file, and plopped this in:
#!/bin/bash

if [[ $2 == "started" ]]; then
    sudo -u youruser DISPLAY=:0 DBUS_SESSION_BUS_ADDRESS=unix:path=/run/user/1000/bus notify-send QEMU "Killing xautolock, setting cpupower to performance"
    sudo -u youruser xautolock -disable
    cpupower frequency-set -g performance
    modprobe i2c_dev
    ddcutil setvcp 0x60 0x0f
fi

if [[ $2 == "release" ]]; then
    sudo -u youruser DISPLAY=:0 DBUS_SESSION_BUS_ADDRESS=unix:path=/run/user/1000/bus notify-send QEMU "Restarting xautolock, setting cpupower to ondemand"
    sudo -u youruser xautolock -enable
    cpupower frequency-set -g ondemand
fi
The script gets the following parameters: $vm_name $hook_name $sub_name $extra. Don't forget to chmod u+x it. Notice the usage of ddcutil there, this will automatically switch the monitor input source to the GPU passed to the VM.
I had a lot of issues with sound before, but it seems to be completely solved, out of the box, without resorting to arcane $PA_* environment variables. This was the part I spent the most time on previously, both sound coming from the VM, and sound going in through a microphone was garbled/crackling, but it seems qemu had a lot of improvements, see later.
I also didn't have to spend any time configuring the network, it seems the default network setup in virt-manager automatically provides routing for the VM, so it can use the host network to access the internet.
Benchmarks
Specs
CPU: AMD Ryzen 5 5600X
Motherboard: MSI MPG B550 Carbon wifi
RAM: 4x8GB Corsair Vengenance PRO DDR4 3200mhz
GPU #1 (host): Asus Geforce GT 710
GPU #2 (VM): MSI Ventus 3X RTX 3070
Storage: Crucial MX500 1TB
PSU: SeaSonic Focus 550W
I got very lucky, and managed to secure the CPU on launch day, and only had to wait 2 weeks for the GPU. Unlike my previous setup, I had to get an extra GPU, since AMD CPUs do not have an integrated GPU in them, and I need 2, one for the VM, and one for the host. I went with the cheapest I could find.
Test method
I'm passing an entire SSD to the VM, which means I can run the Windows10 that is installed on it through qemu, but I can also boot into natively. I think this is the closest you can get to testing the differences in performance between native/vm.
I'm passing 5 cores/10 threads to the VM, out of the 6/12 the CPU has, I'm keeping 1 core on the host, so that it can do IO undisturbed. Note that I'm not really looking at how high scores the VM can achieve, I'm looking at whether it performs at, or near the same level as the native setup.
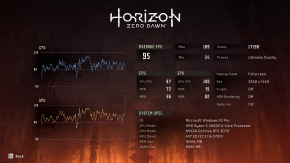
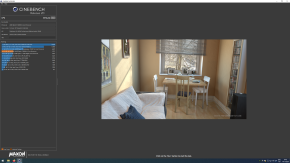
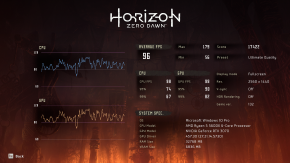
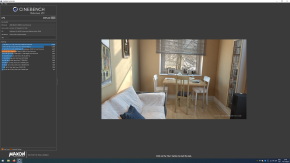
I have done benchmarks using the built in benchmark in Shadow of the Tomb Raider, Lost Horizon, and also used Unigine Heaven, and Cinebench.
VM
Native
After tweaking a few settings, all the benchmarks report the same performance, in both environments, except the cinebench one, but that is understandable. Cinebench focuses on multicore workload, and since the VM has 1 less core, it is of course going to perform worse than the native environment. The games are showing the same benchmarks, since they (I assume) can't utilize that many cores, and that's the benchmark I care about the most.
Tweaks I had to do
Here are some tips that made a noticeable difference for me, and some other things that I did not bother with. I'm including some XML snippets for virt-manager, but as always, it's better to consult the Arch wiki article on VFIO for more up to date tips, since these might be outdated by the time you read them.
Use the virtio drivers for everything
When you are setting up windows, the default drivers that qemu uses, provide worse performance, higher CPU usage, and it will completely mess up keyboard input, when the load is high. The input was extremely noticeable, I could not walk in a straight line in Apex, because it was dropping and repeating keys randomly.
So the process is, install windows as usual, then add another network interface, and specify virtio as the driver. Do the same with storage, and input. Then, when windows boots, download the virtio drivers from Fedora's page.
Mount the ISO, then go to device manager, right click on each unknown device, select "search local computer at path: ..." and provide the mounted ISO. After you do this, you can shut down the VM, remove the extra devices, and change your original devices to use the virtio driver.
Set your CPU governor to performance
I'm not sure if there is a better way to do this, but as I mentioned, your VM might not cause your CPU to ramp up, so you will have extremely degraded performance. You can use cpupower to do this: cpupower frequency-set -g performance.
Use a raw disk
Instead of using a qcow2 file, or a separate partition, give a whole disk to the VM. This gives you the option of booting the disk natively, in case you want to run benchmarks, want to compare things, or have to do some troubleshooting. You do this with:
<disk type="block" device="disk">
  <driver name="qemu" type="raw" cache="writeback" io="threads" discard="unmap"/>
  <source dev="/dev/sdd"/>
  <target dev="sdb" bus="scsi"/>
  <address type="drive" controller="0" bus="0" target="0" unit="1"/>
</disk>
The above will give /dev/sdd to the VM. You can also easily share files between the VM and the host, by mounting the disk. Make sure not to mount this on the host, and run the VM at the same time, as I heard that will instantly corrupt the drive.
Audio crackling/garbling
This should work out of the box, with the following config:
<sound model="ich9">
  <address type="pci" domain="0x0000" bus="0x00" slot="0x1b" function="0x0"/>
</sound>

<qemu:commandline>
  <qemu:arg value="usb-audio,audiodev=usb,multi=on"/>
  <qemu:arg value="-audiodev"/>
  <qemu:arg value="pa,id=usb,server=unix:/run/user/1000/pulse/native,out.mixing-engine=off"/>
</qemu:commandline>
Make sure to replace the 1000 above with your own user id (and it requires pulseaudio of course).
If you have an older VFIO setup, make sure to remove every environment variable that relates to pulse audio.
CPU pinning
You should use CPU pinning, the Arch wiki explains this better than I could, but to give you an example, my lscpu -e shows:
CPU NODE SOCKET CORE L1d:L1i:L2:L3 ONLINE    MAXMHZ    MINMHZ
  0    0      0    0 0:0:0:0          yes 3700.0000 2200.0000
  1    0      0    1 1:1:1:0          yes 3700.0000 2200.0000
  2    0      0    2 2:2:2:0          yes 3700.0000 2200.0000
  3    0      0    3 3:3:3:0          yes 3700.0000 2200.0000
  4    0      0    4 4:4:4:0          yes 3700.0000 2200.0000
  5    0      0    5 5:5:5:0          yes 3700.0000 2200.0000
  6    0      0    0 0:0:0:0          yes 3700.0000 2200.0000
  7    0      0    1 1:1:1:0          yes 3700.0000 2200.0000
  8    0      0    2 2:2:2:0          yes 3700.0000 2200.0000
  9    0      0    3 3:3:3:0          yes 3700.0000 2200.0000
 10    0      0    4 4:4:4:0          yes 3700.0000 2200.0000
 11    0      0    5 5:5:5:0          yes 3700.0000 2200.0000
So that means my CPU thread 0 and 6 are running on core 0, thread 1 and 7 are running on core 1, and so on. I'm going to leave the first core (threads 0 and 6) to the host, and give the rest to the VM. According to the Arch wiki, the following pinning setup gives me the best performance:
<vcpu placement="static">10</vcpu>
<iothreads>1</iothreads>
<cputune>
  <vcpupin vcpu="0" cpuset="1"/>
  <vcpupin vcpu="1" cpuset="7"/>
  <vcpupin vcpu="2" cpuset="2"/>
  <vcpupin vcpu="3" cpuset="8"/>
  <vcpupin vcpu="4" cpuset="3"/>
  <vcpupin vcpu="5" cpuset="9"/>
  <vcpupin vcpu="6" cpuset="4"/>
  <vcpupin vcpu="7" cpuset="10"/>
  <vcpupin vcpu="8" cpuset="5"/>
  <vcpupin vcpu="9" cpuset="11"/>
  <emulatorpin cpuset="0,6"/>
  <iothreadpin iothread="1" cpuset="0,6"/>
</cputune>
Things I did not bother with
Huge memory pages
You can enable hugepages, which will reserve a specified amount of memory, in a continuous chunk, and you can instruct the VM to use this. Since I achieved the same performance in the VM as in native, without this, I did not bother, but I suspect that this is because I have a large enough amount of RAM (32GB), fragmentation does not become an issue. There is a downside as well, whatever you reserve as huge pages, will be unavailable to the host OS.
CPU isolation
This is similar to huge memory pages, but it isolates CPU cores. Didn't bother, same reason as above.
Looking glass
I don't fully understand the point of this, it seems like a way to share the same monitor between the VM and the host environment, but I just plugged in an extra cable, so I have a cable running from the "weak" host GPU to the monitor, and another cable running from the "strong" VM GPU to the monitor, and I use the on screen buttons to change the source after I start the VM.
Downsides
There is only one thing that is a problem, and I don't think it will be solved anywhere near the future, and that is anticheat software in games. Most of the anticheat software has started looking for virtualized environments, and they will kick you out of the game if they detect one, or worse, some outright ban you.
This is a very risky position to be in, since even if a game works right now, you never know when the company is going to flip a switch, and you will find your $50 games banned.
There are various solutions already for hiding the VM, so it's a cat and mouse game, but I'd rather not risk my accounts getting banned. I heard a rumor that Valve is in talks with someone about sorting this issue out.
The only game that I play right now that has anticheat is Apex Legends, which is using EasyAntiCheat, and that seems to have no problems with the VM, and I don't care that much about getting banned either, because it's a free game. I believe VAC (CS:GO) is also okay with VMs, but do your own research before you get banned.
But other than this, I haven't found any issues. I absolutely love that I can isolate my entire gaming environment into a VM, and use my linux host for everything else, without having to dual boot.
Edit 2022.03.10
We live in a wonderful time, and this might be non-issue soon. Valve has started working together with anticheat developers to solve running anticheat on linux, and EasyAntiCheat already works through Proton (a wine fork, unrelated to VFIO). It is possible to play Apex Legends from start to finish through Proton, without any kind of tweaking, you just download it through steam, and click play.


